OIL PAINTING TIPS
How to set up a studio
If you’ve ever wondered how my studio is set up for oil painting and filming of my painting lessons, you’re in luck! Because here, I’m going to show you just how I’ve done it. I’ve also created a video that shows you around my studio and the equipment that I use.

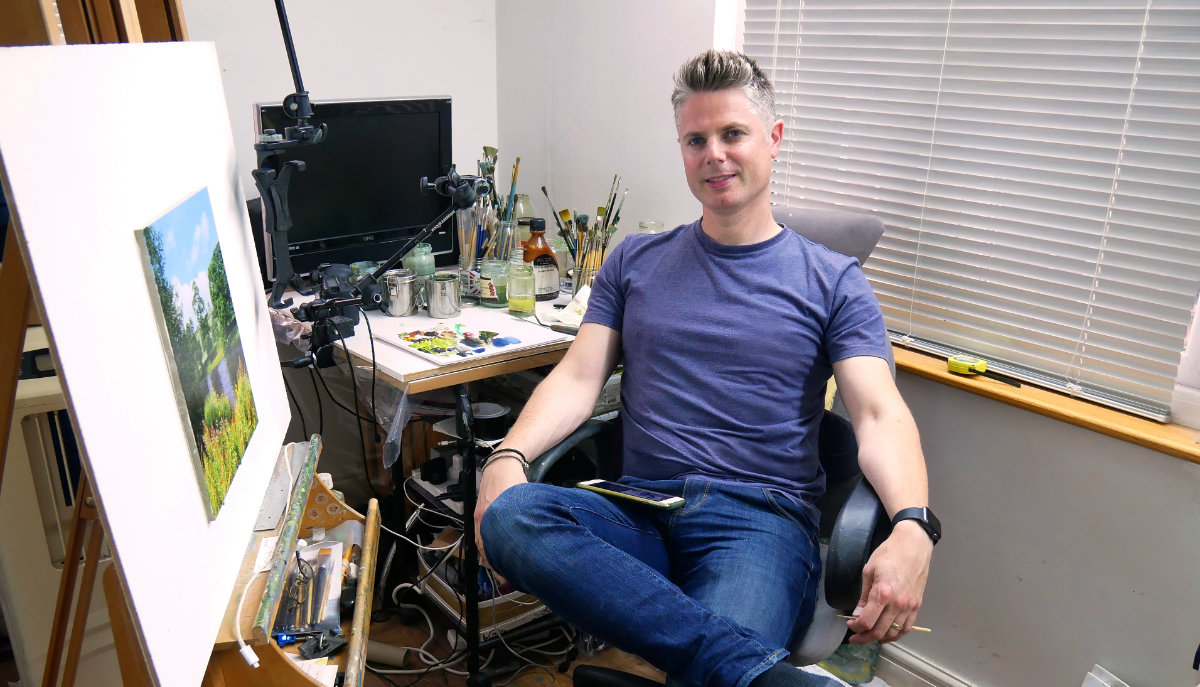
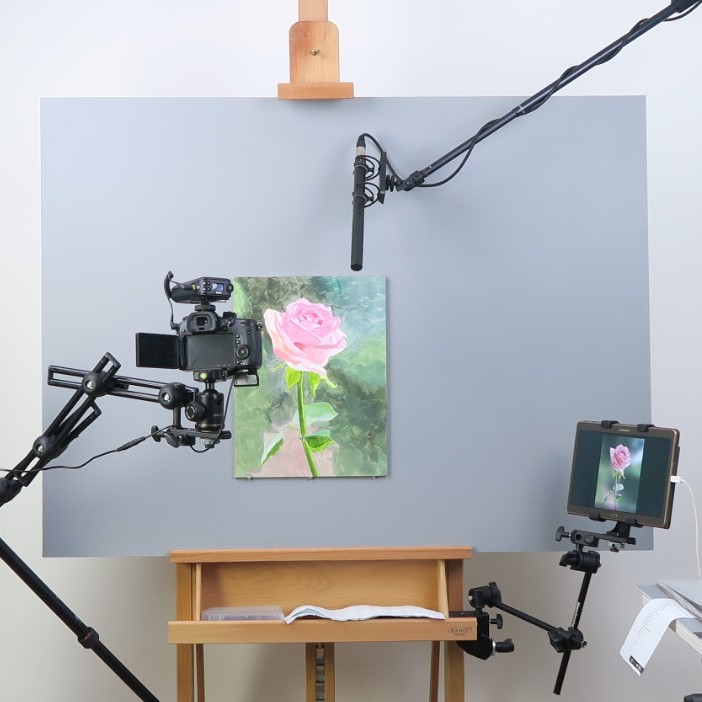
First things first, if you’re new to oil painting and wondering how to set up your own studio, take a look at the image below. This depicts how I set up my studio, with all the equipment that I need in close proximity to me. If you’re left handed, you’ll want to put your palette, brushes and tablet etc on your left so that you can easily reach them. It’s as easy as that to set up your studio for oil painting, just make sure that you have a comfortable chair too.
And here’s me in one of my studio's!
Beginners Guide to start an Oil Painting
If you’re new to oil painting or thinking about signing-up to my MJS Tv, you’ll need a range of equipment to get started.
5 Equipment Essentials
Over my 20-years’ experience as an artist, I’ve tested many different items of painting equipment to see what works best. With the sheer magnitude of oil painting equipment available, it’s easy to get confused and overwhelmed with what to buy. So, I’ve whittled my list down to just five items that I find essential for oil painting, beyond paints and brushes.
If you’re new to oil painting or thinking about joining MJS Tv, this list should give you a good idea of the type of equipment you will need for oil painting or that you might need as you start to advance.
It’s not necessary to purchase the exact same equipment as me to start oil painting or to take part in my oil painting courses. However, I do recommend that you purchase the highest quality equipment that you can afford, as you’ll be happier with the quality and able to produce better paintings.
 Painting Surfaces
I use and highly recommend my own Artists Exhibition Panel. Made of standard 6mm board. The surface is acid free, non-yellowing and archival. Perfect for all painting styles with oil paints, acrylics and mixed media. Each panel has three layers of machine sprayed primer before being hand sanded to ensure a perfectly smooth surface, front and back. Two painting surfaces for the price of one! You can purchase them here.

Easel
There are many different models and styles of easels, but I would suggest that you look for an easel that is very sturdy and allows your oil painting to stand upright. The last thing you want is for your easel to be unsteady and ruin all the hard work that you’ve put in. I use the Mabef M18 Convertible Studio Easel.
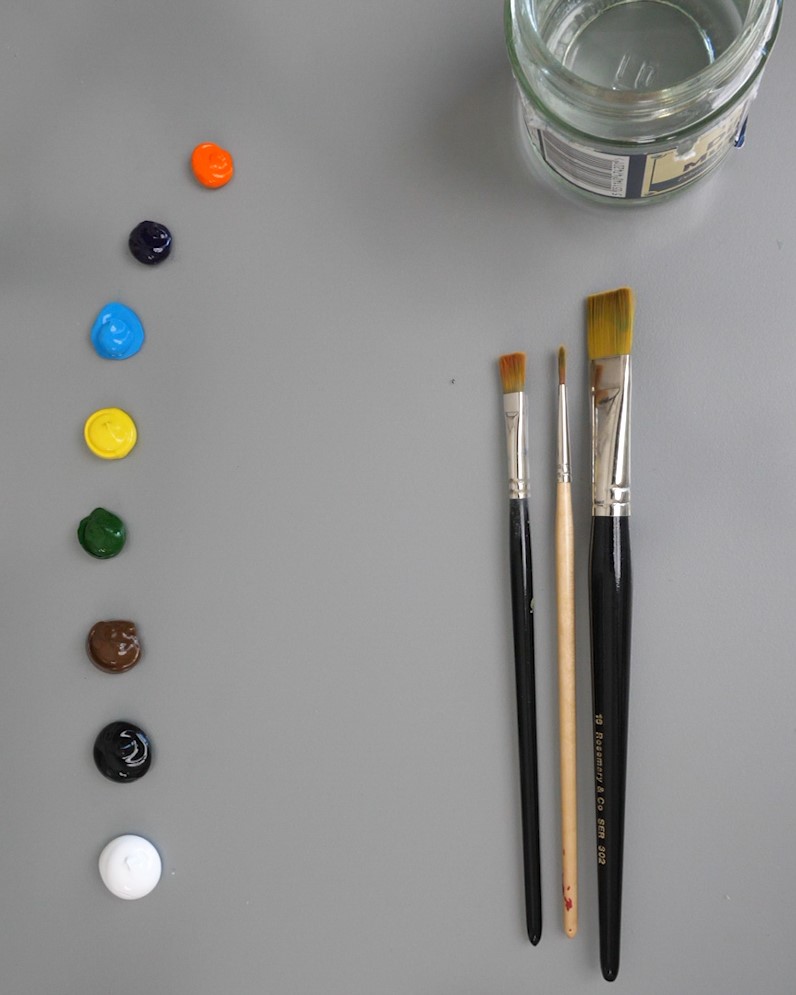 Palette
Any smooth surface that has an even colour will work well for oil painting. Over the years I’ve used plywood, glass and cardboard and even paper in varying colours, and they’ve all been more than adequate. Winsor and Newton make a good product that I’ve used many times, a tear-off pad of 50 disposable vegetable parchment palettes, impervious to oil, acrylic or alkyd colour.
Tablet
I use a tablet computer to view reference images while I’m oil painting and during my oil painting lessons for MJS Tv. Although it can be more difficult to colour match than by looking at a physical image, almost all tablets these days have an exceptional resolution touch screen.
I use a tablet by Samsung which has a 10.5″ screen and requires a very limited amount of image processing from camera to screen. This means that the colours are crisp and very closely matched to your reference photo. Another great advantage to using a tablet is the ability to zoom as needed.
I try to have my reference photo displayed on the screen roughly the same size as the painting, which helps me maintain the correct level of details. If you do not have a tablet to use, you can simply use your laptop or desktop computer, it may not allow you to zoom in as easily, but it will still work just fine.
Tablet Holder
Using a tablet holder makes painting so much easier for me and you may find that it works better for you too. I like it because it allows me to have the reference photo on my tablet as close to the painting as possible. So, I use the Manfrotto 196B2 Mini Articulated Arm. It connects to my Easel via the Manfrotto SC super clamp and on the other end, holding the tablet, is a Hague camera plate and a tripod tablet holder.
How to varnish an oil painting
After all the hard work and time that you’ve spent completing your oil painting, you’ll want to make sure that it’s protected. You may think that a glass frame would offer the most protection but in fact, they are rarely used for oil paintings. For most oil, acrylic and alkyd paintings on canvas, panel or board, it is not necessary to frame under glass. However, if your oil painting was done on paper or thin card, glass may help to provide support for the surface.
The easiest way to protect your oil painting is with varnish. Varnish provides two main benefits:
- It protects the finished painting from years of things that might settle on a painting. i.e. things in the air from cooking, people smoking, dust etc. If the painting ever becomes “dirty” the varnish can be removed and reapplied
- Varnishing brings all the colours in your oil painting back to life because some hues of paint can dry looking dull. It will also ensure that your oil painting stays looking vibrant for longer.
I prefer to use gloss picture varnish by Jackson’s for my oil paintings, as I think that it brings out the details of my paintings better. You can purchase the same varnish that I use here. If you choose to use another varnish, I recommend selecting one that is clear (not yellow) and of artist quality for the best results. It’s also advisable to find a varnish that is flexible, otherwise it could crack over time and damage the surface of the oil painting.
The most important part about varnishing an oil painting is knowing when to do it. Oil paint dries from the outside-in, so although it may appear dry to the touch, it may still be drying or curing on the inside. Oil paint dries by oxidation, so if you put the varnish on too soon, you will cut off the oxygen that allows the paint to dry.
Some people recommend waiting for between 6-12 months before varnishing an oil painting but the time it takes to dry is dependent upon a number of factors:
- How thickly or thinly the oil paint is applied
- Which kind of oil paint is being used
- The temperature where the oil painting is drying
- How humid the air is
- What type of medium was or was not used
I typically wait a week before I apply gloss varnish. This may seem too soon for some, but my method of painting makes my oil paintings dry very quickly. I paint very thinly throughout, using acrylic paint for blocking in, followed by Winsor and Newton’s Fast Drying Alkyd Oil Paints, together with white spirit and Winsor and Newton Liquin Original for my mediums. Each of these aids my paintings to dry faster.
For paintings that use regular oils, with paint applied thickly, or where slower drying mediums have been used, a greater time should be allowed before varnishing. Typically, 6-months to 1-year. If you would like to put a varnish on to your oil painting sooner, you can use artist’s retouch varnish. This places a temporary coat onto the oil painting which will help to protect it and revive the colours. This type of varnish is breathable, so it allows the painting to continue drying. Another alternative is Gamvar gloss varnish by Gamblin. This varnish breathes and removes the need for retouch varnish. It can easily be removed from the oil painting when needed, using Gamsol by Gamblin (similar to white spirit).
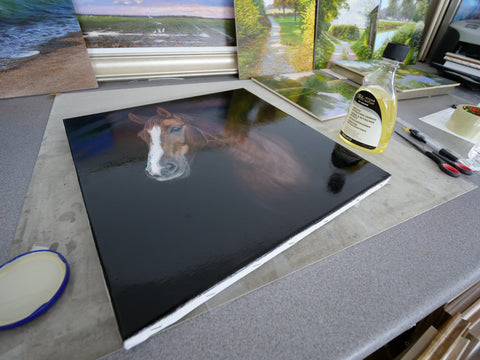
The Varnishing Process
- You will need to use a good quality varnishing brush that is flat and wide, soft and tightly packed. The last thing that you want is a rogue brush hair coming off onto your masterpiece.
- Lay the oil painting down onto a dust free and clean surface. Do not varnish the painting while it is vertical. Shut any windows and doors as a precaution.
- Apply the varnish to the oil painting in one to three thin coats rather than one thick coat. Use long even strokes moving up and down and overlapping slightly. Once you leave an area, avoid going back to it.
- Allow the varnish to dry for 24-hours. If a second coat is required, repeat the process again.
As soon as your oil painting is varnished and completely dry, you’re ready to hang it for everyone to enjoy.
Office address:
Edward Valentine Ltd, The Old Bakehouse, Fullbridge, Maldon, Essex, UK, CM9 4LE
Office Opening Times:
Monday to Friday 9.00-17.00 GMT/BST
You can contact us at:
admin@shopmichaeljamessmith.com