How to Paint Fine Details and Grass Using Rigger Brushes 🎨
Every artist knows how tricky it can be to capture those really fine details—like blades of grass or thin tree branches. That’s where the Rigger Brush comes in. It’s one of my favourite tools for achieving sharp, delicate lines in a painting.
The brushes I would traditionally use to paint fine lines are the Rigger Brushes which are available here.

Why the Block-In Matters
Before you begin, one rule is essential: the block-in layer must be completely dry. The technique I use then depends on the colour of the surface I’m painting over.
-
On a light surface (e.g., painting branches over a pale sky): I thin the paint slightly. Rolling the brush in the paint helps keep a fine point, making delicate details easy to achieve.
-
On a darker surface (e.g., grass against a shadowed background): I keep the paint thick, giving a strong impasto effect with excellent coverage.

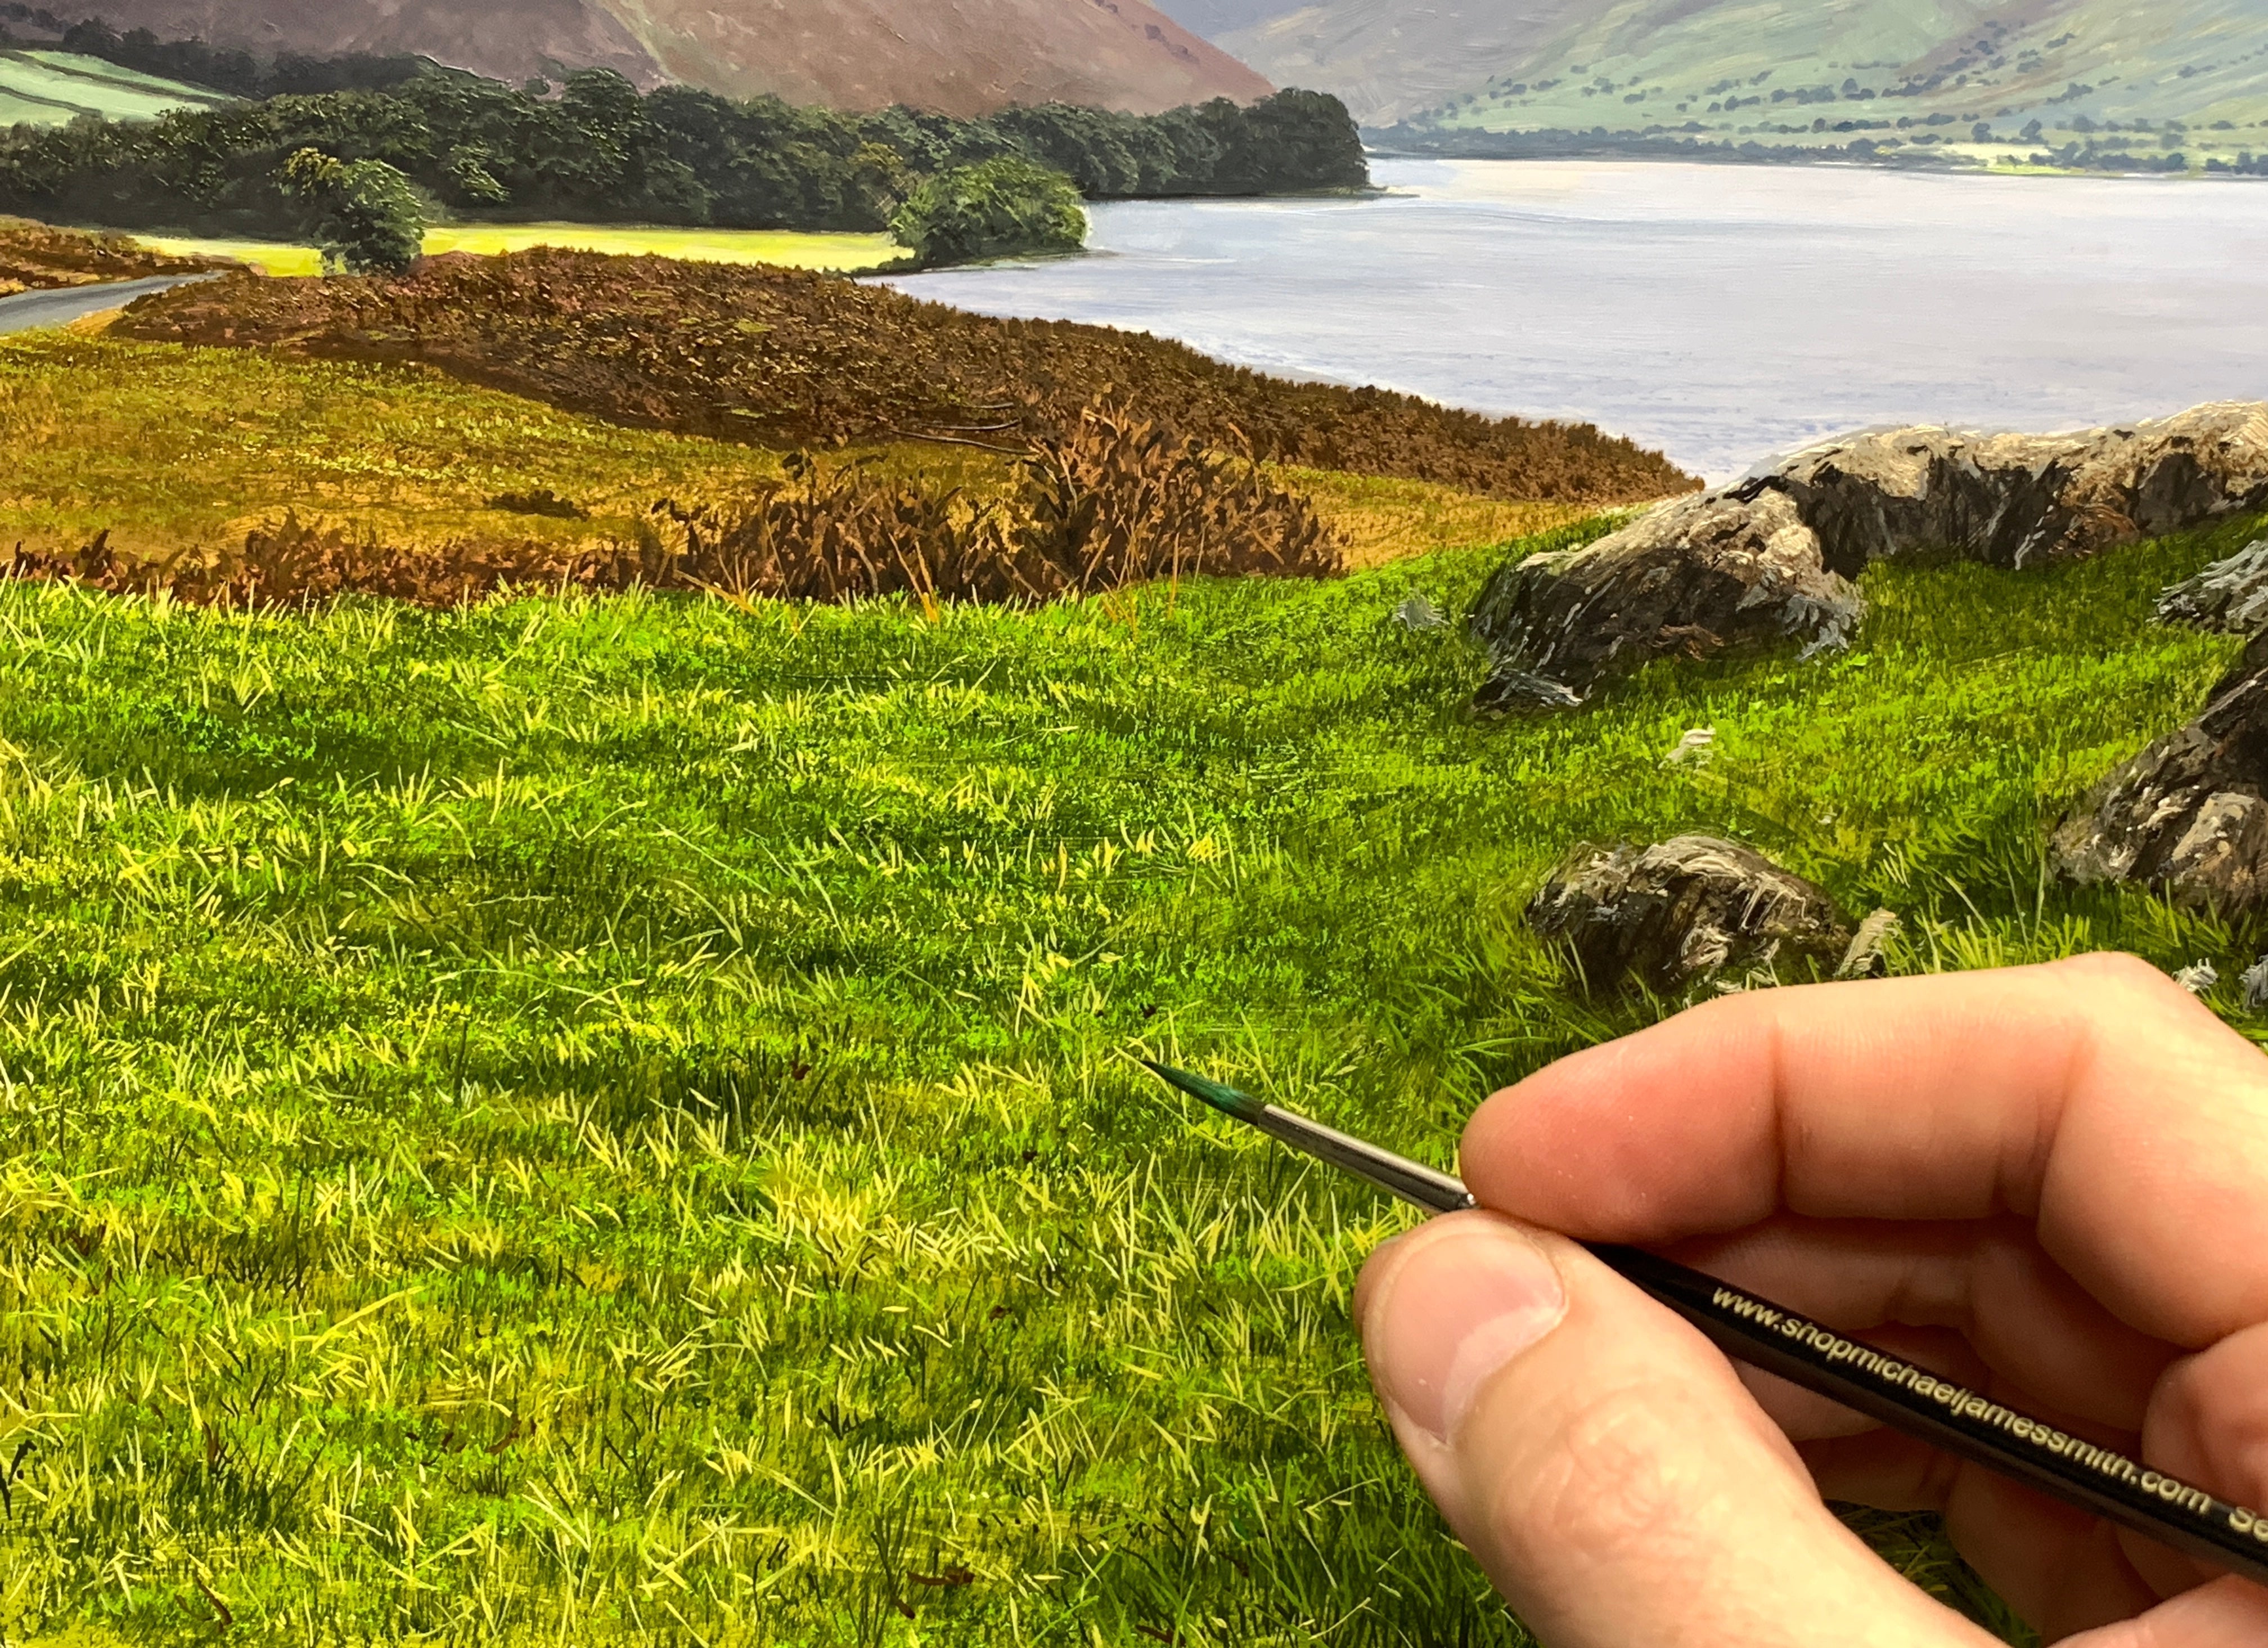
Painting Realistic Grass
-
Begin with a dry, mid-tone block-in layer.
-
Apply darker shaded areas first.
-
Using mid-tones, start layering grass blades with the very tip of the brush—no medium or thinner needed.
Use a “touch–lift, touch–lift” motion to create fine strokes. Short strokes are best; long strokes can break or lose sharpness. Resting your hand on the panel (using your knuckle as support) will help keep your lines steady.
To avoid repetition, vary the angle and thickness of the blades so they don’t all look the same. The thick impasto paint has a higher pigment load, giving excellent covering power and a textured finish that feels almost like sandpaper when dry.


-------------------------------------------------
Watch my Technical Exercise Video
‘How to Paint Fine Lines’

In this Technical Exercise Video, I’ll show you how to achieve clean, crisp lines with confidence using the Rigger Brush.
You’ll learn how to:
-
Thin paint for a smooth, even flow
-
Load and roll your brush to form a fine point
-
Apply steady, controlled strokes for professional results
These techniques are perfect for beginners building confidence, as well as more experienced painters looking to refine their detail work.
----------------------------------------------
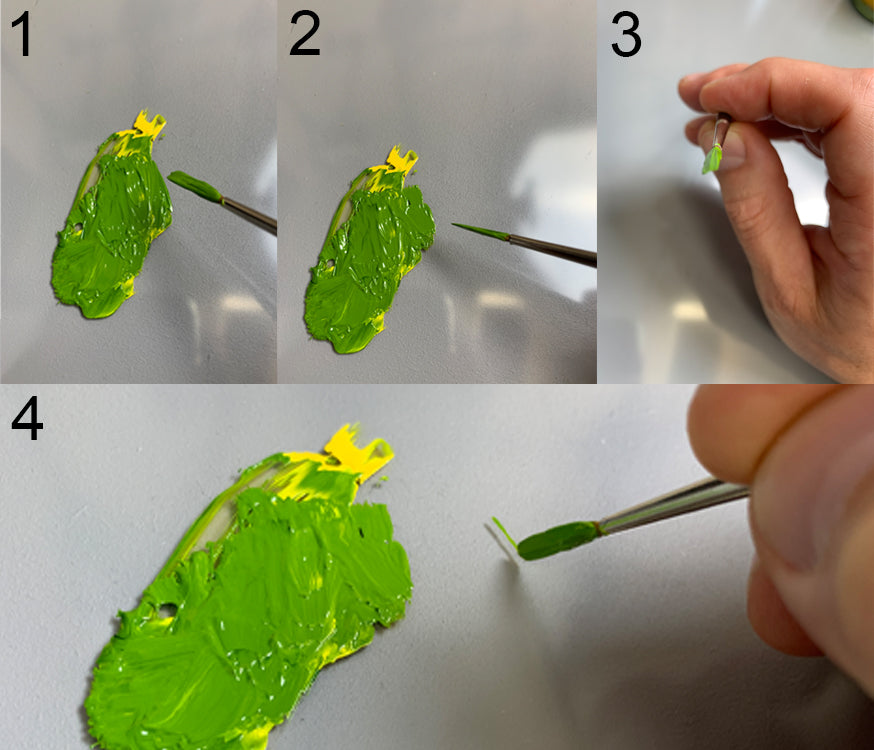
Preparing the Brush for Sharp Lines
To achieve crisp, blade-like strokes, start by making sure you have plenty of paint on your palette. Load the brush by dragging it back through the paint, then turn it 90 degrees and drag again. Repeating this process gives the brush a sharp edge on one side and a flat surface on the other—almost like a mini palette knife. This preparation allows you to create fine, precise lines while still holding enough paint for smooth application.

Use the sharp edge of the brush to draw fine, delicate lines, working with just the very tip. This allows you to paint even the tiniest blades of grass. Keep your strokes short and controlled rather than long—this helps maintain crisp, thin marks and avoids creating thicker, broken lines.

Rigger vs. Dagger Brush
The Rigger Brush excels at producing ultra-thin, controlled lines, while the Dagger Brush creates a slightly broader, blade-like stroke. Both are useful, but when you need absolute sharpness and precision, the Rigger is hard to beat.
Layering for Depth
Once the mid-tones are in place, add lighter hues on top. Keep your brushwork random—avoiding obvious patterns—to create a natural look. For areas in the foreground, thicker paint with impasto works beautifully, adding sharpness and depth. If you need smoother, flatter lines, then a touch of thinner can be used—but sparingly.

Final Tip
Consistency is everything. As a rule, avoid adding medium or thinner unless the paint begins to dry out—then use only the smallest amount. The key is to keep your paint thick enough to sit well on the brush, giving you strong, clean strokes every time.
👉 Why not give this technique a try? With practice, you’ll be amazed at how much realism and texture a simple Rigger Brush can bring to your paintings.
You can buy my Rigger Brushes here
I now have 2 new sizes of Superfine Rigger Brushes
available individually or as a set here

You can see my YouTube video on this subject below
Happy painting!
Michael
