Painting Detail with the Series 6 Short Flat Brushes
The Series 6 Short Flat Brushes are a staple in my landscape paintings, perfect for adding crisp detail and texture. Available in two sizes, these versatile brushes give you excellent control when painting rocks, foliage, snow, and other fine details.

You can purchase them here.
Adding Texture to Rocks
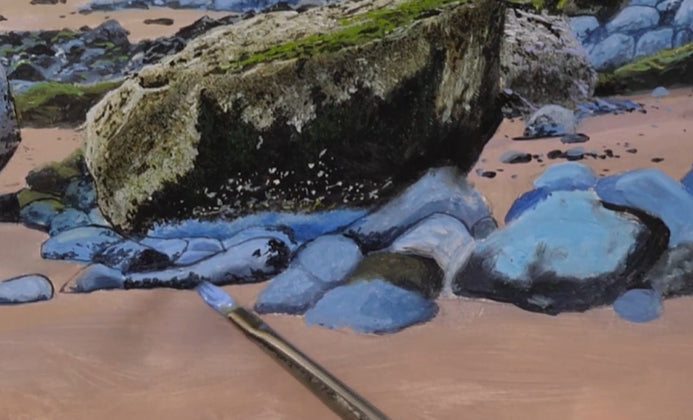
In my Beachy Head Lighthouse painting, I used the Series 6 brush to create natural rock textures. By dabbing on paint without thinner, you achieve a beautiful dappled effect on the surface. The straight tip of the brush is ideal for defining sharp edges along the rocks, making them stand out with a realistic three-dimensional quality.
👉 Watch the Beachy Head Lighthouse tutorial here.


Defining Tree Lines and Fields
The flat tip of the Series 6 brush is excellent for painting crisp, clean lines. In my Bright Winter’s Day painting, I used short, controlled strokes to define the tree line and the edges of snowy fields. Dabbing the paint also adds texture, which enhances the contrast between light and shadow across the landscape.
👉 Watch the Bright Winter’s Day tutorial here.

Painting Snow and Highlights
When painting snow scenes, the Series 6 helps bring out depth and subtle detail. In Winter’s Light, I used smooth, short brushstrokes to define where the snow rests against rocks and trees, and to highlight uneven surfaces like footprints. Brushing side-to-side with the flat tip accentuates the contours of the snow.
Be careful not to load too much paint on the brush.
As it’s a stiffer brush, it gives you more control and makes it easier to apply the paint.
Intricate Detailing
Because the Series 6 is slightly stiffer, it gives you more control over the paint. The smaller size is perfect for intricate highlights, such as the crisp edge of a snow overhang. Using paint straight from the tube (without thinner) adds extra texture. For broken, rocky details, try tapping the paint on instead of brushing—it creates small, fragmented lines full of character.
I used this exact technique in my Breakthrough painting to emphasize the light and dark areas across the hillside rocks.
👉 Watch the Breakthrough YouTube time-lapse here.
Why I Recommend the Series 6
-
Control: The stiffness allows for precise detail.
-
Versatility: Great for textures, edges, and fine lines.
-
Realism: Perfect for adding depth and definition to landscapes.
If you’re looking to sharpen your detail work and add realism to your landscapes, the Series 6 Short Flat Brushes are an invaluable tool.
You can buy my brushes here
Happy Painting!


