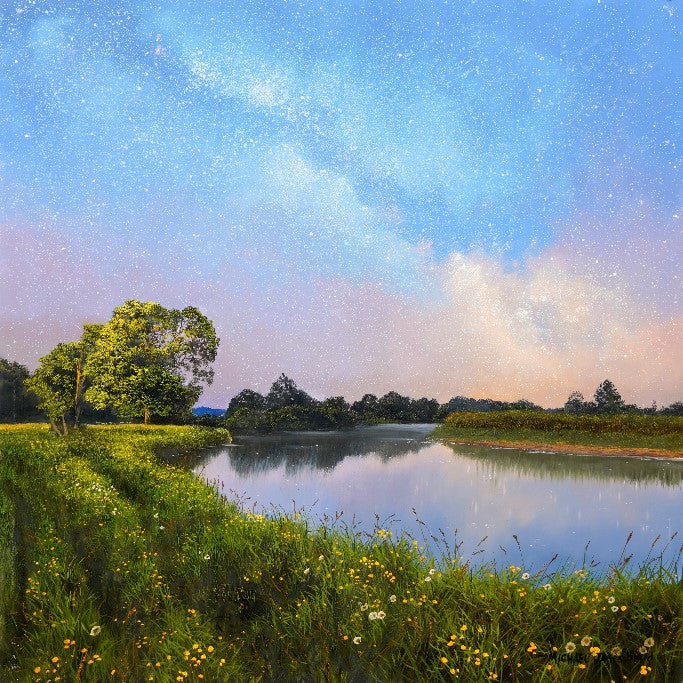
Creating Stars with the Fan Brush
When I filmed my Starry Night lesson, I was pushed outside my comfort zone. It had been years since I’d used some of the techniques required—taking me right back to childhood experiments with paint! After a little trial and error with different brushes, I discovered that the Fan Brush gave me exactly the effect I was looking for.
It turned out to be one of the most enjoyable lessons I’ve ever created, and I hope you’ll
find it just as fun to try.

Series 4, Fan brush available in 2 sizes is available to purchase here
Getting Started
Once your sky tones are in place, the next step is getting the right paint consistency. Adding a touch of thinner helps create the perfect spray effect, but it may take a few tries to get it just right.
👉 Tip: Before applying paint directly onto your canvas, practice first on a piece of card—ideally close in colour to your sky (though white card works too). This helps you judge the right amount of paint, thinner, and distance from the surface. Once you know you have the correct distance from the surface, the correct amount of paint and consistency and are familiar with the technique, you can then move the card and paint directly onto the canvas.

Technique for Splattering Stars
-
Load only the corner of the brush, wiping off excess paint. The drier the brush, the finer the speckles. Add more thinner if you want bigger stars.
-
Hold the Fan Brush close to the panel, bend the bristles back gently, and release to create a fine spray of stars.
-
The closer the brush is to the surface, the tighter the cluster. The further away, the more scattered the effect.
-
To concentrate stars in certain areas, mask parts of your painting with paper. Tear or cut small holes in the paper to localise the spray.
👉 Tip: If you get unwanted splatters, blot gently with a tissue while the paint is still wet.
Variations and Effects
The shape of the Fan Brush allows for a range of splatter styles:
-
Flat/widthways flick – produces a wide, fanned-out spray.
-
Pointed flick (from the corner) – gives a more controlled, evenly spaced pattern.
Experiment with brush angles, pressure, and distance to create the desired look.
Remember, the more thinner is added, the bigger the dots!
Ensure the paint is only on the corner of the brush, by wiping off any excess. The drier the brush the smaller the speckles, if you want bigger stars thin the paint a bit more.


Correction is easy, if the paint is too wet you may get large splatters where you don't want them, don't worry if this happens, gently blot with a tissue to remove!

Cover parts of your painting to prevent sprays effecting areas where you do not want
To create more concentrated areas of stars, tear or cut a small hole in a piece of masking paper and hold it close to the panel. This will localise the splatters, forming tighter clusters. The nearer the paper is to the surface, the denser the stars will appear. There’s always a little bit of trial and error involved, but that unpredictability often leads to the most natural-looking results!


Adding Larger Stars
For brighter stars or focal points, I used a Series 2 Pointed Brush. By rolling it in the paint, you can maintain a sharp, circular tip and add larger, more defined stars with precision.

Series 2 Pointed brush available to purchase here
Final Thoughts
It’s a messy technique, but one that creates a stunning effect! With a little practice and experimentation, you’ll soon be able to fill your skies with convincing clusters of stars that bring your night scenes to life.
So grab your Fan Brush, have fun with the process, and don’t be afraid to get a little paint on your fingers—sometimes the most effective techniques are the messiest!
Try my 'Starry Night' tutorial here
Happy painting!
